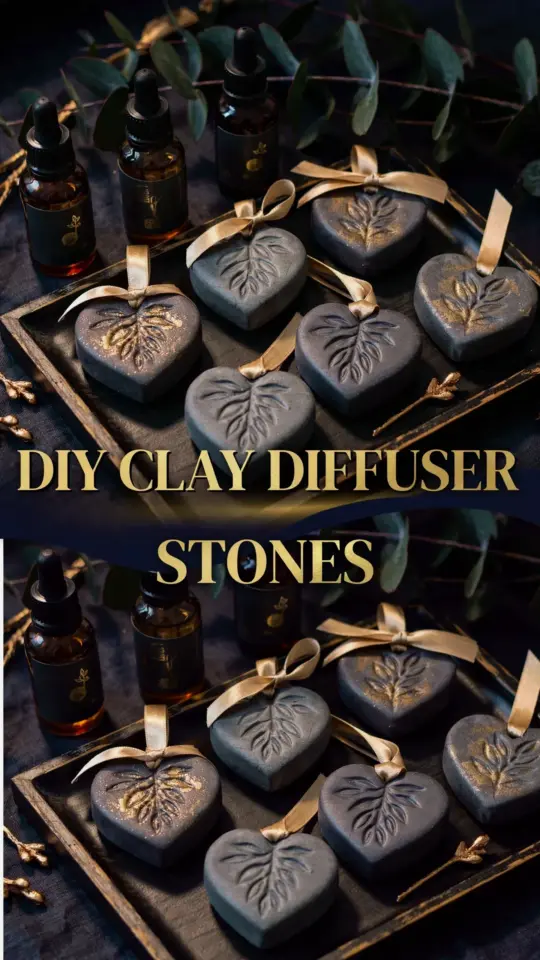
Honestly, I’m still a little shocked at how well clay diffuser stones turned out for me. I made my first batch last weekend, and the difference between my plain, dusty shelf and what I have sitting there now is genuinely wild. My room doesn’t just smell nice for an hour after I spray something; it stays lightly scented all day, with zero electricity, zero flames, and zero effort beyond a few drops of oil in the morning.
I went into this thinking they’d be a cute little craft project, maybe something to toss in a drawer to make my socks smell less like my gym bag. I did not expect to basically build a tiny aromatherapy station that runs on nothing but air and my own stubbornness. So consider this a curated roundup of ideas, a sort of before-and-after tour of what happened when I let a bag of clay take over a whole weekend.
Starting Simple: The Humble Dome vs. The Freeform Rock
Ok so, first thing I learned is that shape matters way more than I thought it would. I started with the classic round dome, kind of like a smooth river stone, because it’s the easiest thing to roll in your palm without messing it up. They are cute. They sit nicely in a little dish. But here’s the thing, they roll away. I lost one behind my monitor and found it three days later, still smelling faintly of cedarwood.
Then I started making freeform shapes, just pinching off chunks and squishing them into these organic, lumpy little nuggets with flat bottoms. No pattern. No guides. Just throwing a piece of clay onto the table and letting it land however it wanted to. Honestly, the flat-bottomed ones are the real winners. They stay put, they catch the light differently, and they look like little artifacts instead of perfect beads. One of my favorites is this jagged, almost ugly piece that I refuse to smooth out because it looks like a tiny mountain range.
Styling Your Station: Matching the Stones to the Shelf
So you’ve got your stones, but where do they actually belong? I took a little ceramic bowl, the one I usually keep loose change in, and swapped the coins for a handful of my new stones and a single sprig of dried lavender. It looks intentional, like something from a fancy spa catalog.
You can absolutely match the aesthetic to your room. If your space is all dark wood and brass, leave the clay raw and natural. If you’re more of a minimal, boho vibe, paint a few with a thin white wash. I haven’t gotten that fancy yet, but I did nestle one into my desk plant pot, just resting on the soil next to my snake plant. That convinced me this whole thing is viable. My plain shelf transformed into a little moment, a tiny corner of the room that smells like rain and pine.
Here are the places I tested that actually worked:
– Inside a winter coat pocket, which made getting dressed on cold mornings feel slightly less criminal.
– On the bathroom windowsill, where the steam from a hot shower seems to wake the scent up even more.
– Under the couch cushions (yes, really), which is weirdly effective for pet smells.
– In my gym locker tucked into the mesh pocket, but that one is a secret to keep the scent to myself.
– Next to my reading chair, where I can just pick it up and huff it when I get distracted.
The Scent Blending Lab: Because One Oil Gets Boring
I thought I’d just use straight lavender and call it a day. That lasted about four hours before I started raiding my collection of essential oil bottles. The cool thing about clay is that it acts like a sponge, and you can layer scents directly onto the stone without mixing them in a bowl first. Put a drop of sweet orange on one side. Put a drop of geranium on the other. The stone slowly mulls them together over a few hours.
My new favorite combo is actually a bit of a headache to describe, but I’ll try. It’s this deep, grounding base of patchouli, just a tiny drop, with a sharp, clean pop of grapefruit on top. I usually hate patchouli because it reminds me of a dusty head shop from 2007, but the clay seems to smooth out the rough edges. It takes the stank out and leaves the earthy root behind. The experimentation is honestly the best part because if you ruin a stone with a bad blend, that’s fine. Just let it dry out for a day and the smell fades. Almost like it never happened.
Gifting the Ugly Ones: A Realistic Take
Look, not every stone you make is going to be a masterpiece. Some of mine look like sad, grey potatoes. I’m not going to lie to you about that. But here’s the thing about clay, the imperfections are what make them charming. I wrapped a few of the less-ugly ones in a little piece of linen scrap, tied them with kitchen twine, and gave them to my neighbor. She put them on her nightstand and texted me two days later asking if she could order more.
You can genuinely make a whole gift set for under ten bucks. The cost of a bag of clay is nothing compared to a store-bought essential oil diffuser that needs a cord and a cleaning schedule. Plus, when you give someone a stone you made, you’re handing them a tiny piece of your own time. That sounds cheesy, but it’s true. There’s a weird social magic in giving someone a rock that smells like their favorite forest.
Maintenance and the “Fading” Problem Solved
So, yes, the scent fades. That’s physics, not a design flaw. I found that a fresh stone will hold a scent for a full day, sometimes longer if I keep the room cool. But by day two, you need a refresh. Just add two more drops of oil, right on the top, and give it a second to soak in.
What you shouldn’t do is drown it. I learned that the hard way when I dumped like eight drops of eucalyptus on a tiny stone and it left a weird, oily residue on my wooden shelf. That was a dumb move. The clay can only hold so much before it gets greedy and spits it back out. Use a light hand. Respect the porous nature of the material. And if you do oversaturate, just leave it in a sunny windowsill for a day to evaporate the excess.
Another weird trick I picked up is to rough up the surface with a little sandpaper after the stones are fully dry. I used a nail file, because who has sandpaper in the house? The slightly rough texture gives the oil more nooks and crannies to cling to, so it releases more slowly. That tiny adjustment made a bigger difference than any expensive “slow-release” additive I’ve seen online. You don’t need fancy tools. You just need a bit of patience and a willingness to sniff a rock to check if it’s ready.
My Honest Permission Slip To Skip The Perfection
You don’t need a pottery wheel. You don’t even need a kitchen scale. I used a standard air-dry clay, some water, and my bare hands. I mixed the clay until it was a little tacky, then I just started pinching and patting. There’s a real freedom in not caring if the shape is symmetrical, because these basically look like they were dug up from an archaeological site anyway.
When the stones are fresh, they are really fragile. One of mine snapped in half while I was trying to poke a hole in it for a necklace. I almost threw the whole project in the trash at that moment. But I just glued the two pieces back together and called it a “rugged look.” Now it’s my favorite one. It’s a good reminder that the entire process is forgiving, and even when you break something, you can usually just stick it back together and move on with your life.
Just make sure you let them dry completely before you oil them up. Trust me on this, oiling a wet stone is a one-way ticket to Mold City. Give them a full 24 to 48 hours on a drying rack, maybe flip them once to get the underside, and then you’re free to start your little aromatherapy experiments.
So here’s my final take. Clay diffuser stones are the perfect weekend project because they’re cheap, they smell fantastic, and they look way more expensive than they actually are. They don’t need to be perfect, they just need to exist. Save this for your next DIY session and give yourself the grace to make a few ugly ones first. When you make one that actually works, let me know what scent combo you landed on, I’m always looking for a new favorite.
#claydiffuserstones #diyessentialoils #aromatherapy #essentialoildiffuser #diyhomefragrance
Leave a Comment