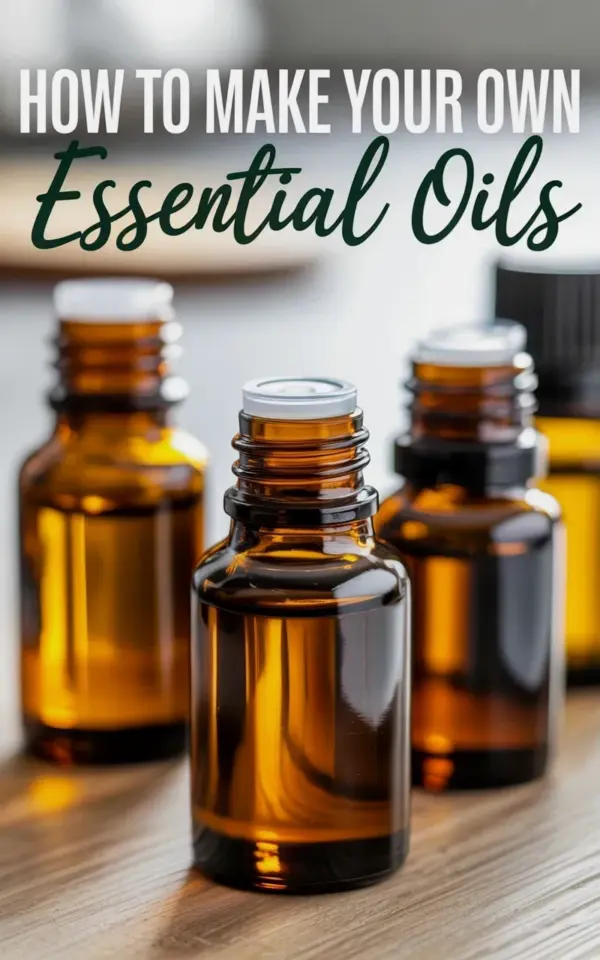
The first time I blended my own winter scents, I didn’t even own a proper dropper. I used a plastic pipette from a kid’s chemistry set and labeled the bottles with masking tape. But the moment I sniffed that mix of sweet orange and lavender, I was hooked. Making DIY essential oils isn’t some mystical craft reserved for herbalists or chemists. It’s honestly just a matter of mixing quality ingredients, letting them sit, and showing a little patience. These amber bottles on my kitchen counter look exactly like the ones in the photo you might have seen, lined up on a pale wooden board, catching the afternoon light.
This batch is my third one this season. I’ve got three bottles in sharp focus right now, with white screw caps and that gorgeous golden liquid glowing inside. The rest of the row blurs into the background, which is honestly how my whole kitchen feels during holiday prep. If you have been staring at the high price of small glass vials in boutique shops, this guide is for you. We are going to cover the actual steps, the exact ratios, and the simple equipment you need to create personalized holiday gifts that smell like a winter forest or a citrus grove.
Why Bother Making Your Own Blends at All
Store-bought essential oils are convenient, but they are also seriously expensive. A tiny 10ml bottle of a fancy brand can cost you as much as a decent bottle of wine. When you have to gift presents to coworkers, neighbors, and your kid’s teacher, that price tag gets ridiculous fast.
When you mix them yourself, you control the quality of the carrier oil and the exact scent profile. Plus, the process is relaxing. I find the whole ritual of counting drops and corking the vials to be a weirdly meditative break from the chaos of wrapping presents. It feels productive, but in a slow, tactile way that scrolling on my phone never does.
And let’s be honest, there’s a certain flex in handing someone a gift and saying, “Oh, I made that scent myself.” It feels personal because it is. You cannot buy that story at a retail counter.
Understanding Carrier Oils vs. Essential Oil Drops
Ok so here’s the thing that confuses everyone at the start. You do not actually “make” the essential oil from scratch in your kitchen sink (that requires a still and a ton of plant material). What you are really doing is creating an **essential oil blend**, also known as a roll-on or a perfume oil.
To do this, you need two things. First, a carrier oil, which is a neutral, unscented base oil like jojoba, sweet almond, or fractionated coconut oil. Second, you need pure essential oil concentrates (like peppermint or cedarwood) to add the actual smell. Think of the carrier oil as the blank canvas and the essential oils as the paint.
For winter gifts, I recommend jojoba oil because it has a long shelf life and doesn’t go rancid easily. I once used olive oil for a trial batch because it was all I had, and honestly, the salad dressing smell overpowered the lavender. Do not repeat my mistakes. Stick with something light and odorless.
Step-by-Step: Mixing Your First Batch (The Math Part)
Look, you don’t need a lab partner for this, but you do need a safe dilution ratio. For a 10ml roller bottle (the standard amber standard), you will want roughly 30 drops of liquid total. If you fill the rest with your carrier oil, you allow the scent to diffuse without being overwhelming.
A good rule of thumb is to use about 5 to 7 drops of essential oil per 10ml bottle. I always start with less, because you can add drops, but you cannot take them out easily once they are mixed. Here’s a super simple recipe to try:
– 5 drops of Sweet Orange oil for that bright, cozy kick.
– 3 drops of Lavender oil to round out the sharpness with a floral softness.
– 1 drop of Vanilla absolute (or plain vanilla extract if you are in a pinch) for warmth.
– Fill the rest of the vial with jojoba carrier oil.
Twist the cap on and roll the bottle between your palms to mix the liquid. Do not shake it violently like a martini shaker. Gentle rolling works best.
Three Winter Scent Blends That Actually Work
Everyone has different taste, so I am giving you three solid combos that are crowd-pleasers. The first one is the citrus lavender mix I mentioned earlier. It smells like a sunny day in a spa, which is a nice escape from the gray January chill.
The second blend is a woodsy number. I mix **cedarwood** and a couple drops of **clary sage** with a base of sweet almond oil. This one is earthy and grounding, and it makes me think of a cabin in the mountains. It is an incredibly popular winter scent for men, but honestly, I wear it myself more than anyone else in my house.
The third is my absolute secret weapon for holiday parties. It’s a **gingerbread spice** blend using ginger, cinnamon bark, and a single drop of cardamom. It’s like a bakery exploded in a bottle, but in a sophisticated way. Not gonna lie, the first time I made it, I nearly huffed the entire vial in one sitting.
Bottling, Labeling, and the Gift Wrapping Hack
Once your oils are mixed, you need to put them in those attractive amber glass bottles. Not only does amber glass match that aesthetic you see in the photo, but it also protects the oil from UV light degradation. Clear glass lets the light in and ruins your expensive ingredients.
For labels, do not worry about fancy printable sticker sheets. I use a simple grease pencil to write the scent name and the date on the glass itself. It gives it that homemade, rustic look. You can also use small kraft paper tags tied with baker’s twine, which photographs beautifully on Instagram.
Here is a wrapping trick I learned by accident. Slip the bottle into a small muslin drawstring pouch, then tie a sprig of dried rosemary to the string. It looks high-end, but it costs you about twenty cents per gift.
Storage, Safety, and How to Make Your Batch Last Longer
This is the part nobody talks about. Natural oils degrade, and sunlight is your enemy. Even though the glass bottles protect from UV rays, you should still store them in a cool, dark place when you are not using them. A bathroom cabinet that doesn’t get hot is fine, but a pantry shelf is better.
You also need to patch test your blend. Even though it’s diluted, you never know if you have a sensitivity to cinnamon or a citrus oil like bergamot. I learned this the hard way when I gave a bottle to my brother once, and it irritated his skin because I had used too much clove. It freaked us both out.
Be mindful of the “use by” date. Carrier oils can go stale eventually. I always write the date on the bottom of the bottle so I don’t have to sniff-test everything in six months. Generally, a blend with a stable oil base like jojoba will stay good for about a year if sealed properly.
Putting It All Together for Your Holiday Gifts
The real fun happens when you organize a little assembly line. I spread out my bottles, my carrier oil, and my array of essential oil concentrates on a tray. I put on a record (yes, a vinyl record, I am that person) and I buzz through about forty bottles in an hour while sipping a hot tea.
You can really impress your friends by tailoring the scent to their personality. For your chaotic friend, maybe give the uplifting citrus. For your aunt who loves hiking, give her the cedarwood blend. This level of customization makes the gift feel intentional and rare, and honestly, that beats anything you could order online.
So, whether you want to fill your home with the scent of pine and baking spices, or you just want a fun winter project to keep your hands busy, this is the easiest DIY holiday gift idea. The amber bottles look beautiful on the counter, the house smells like a winter market, and you feel incredibly smug about how little you spent.
Go ahead and pull out your kitchen scale and a few small jars. You won’t regret it. And if you save this idea for your next weekend project, you will have your whole gift list checked off by Sunday night.
Leave a Comment